AstroPhotography Projects
by C.Y. Tan
Project maintained by cytan299 Hosted on GitHub Pages — Theme by mattgraham
Welcome to my astrophotography projects page
I started astrophotography as a hobby in 2014 by resurrecting my 8 inch LX200 classic that I bought more than 10 years ago. In my naïveté, I had had assumed that my alt-az mounted LX200 would be a good platform for astrophotography, but to my chagrin, I found field rotation messing up my ambitions ☺. Although I have a wedge for the LX200, my utter dislike of equatorial mounts (but see next paragraph) and other technical problems with using it together with my SBIG STF8300C camera forced me to design and build, from scratch, a field derotator. This led to other projects that I designed and built in order to complement and improve my LX200 astrophotography platform. All my Open Source projects are listed below and hopefully they will be useful to you, the astrophotographer, as well.
Of course, things change as I gain more experience with astrophotography. I have since moved from alt-az mounts to equatorial mounts: Astro-physics Mach1GTO and AP1100AE. These excellent equatorial mounts have changed my mind about them. And I now use equatorial mounts exclusively.
Field DeRotator
The field derotator was my first project. My main reason for designing and building a field derotator is because I like alt-az mounts and really, really dislike equatorial mounts (see previous paragraph). My research into field derotators uncovered a common myth among hobbyists that they are difficult to use. Fortunately, after successfully building and then using my field derotator, I believe I have debunked this myth completely. See for example, the Crab Nebula that I took using my field derotator.

So, if you are sick and tired of equatorial mounts and want to get away from it and use an alt-az mount instead, please follow my instructions for how to build one here.
A Tri-Bahtinov mask for aiding focusing and collimation
One thing that all SCT owners are always aware of but perhaps don't do as often as necessary is collimation. I thought that the best way to remedy this situation is to modify a Bahtinov mask to allow it also be a collimation diagnostic as well. So, here's what I came up with: a Tri-Bahtinov mask.
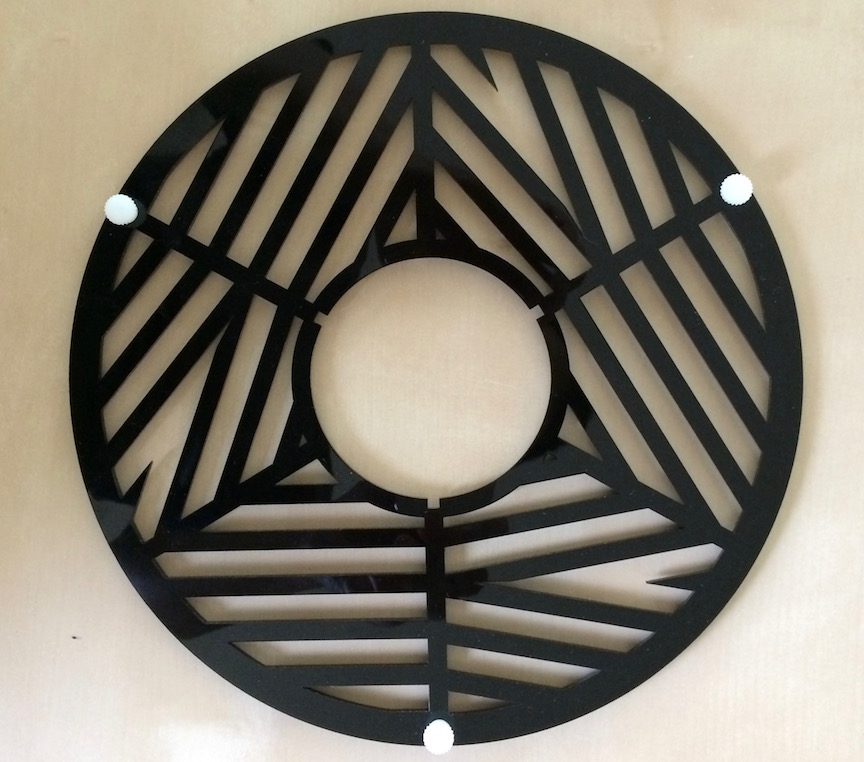
Therefore, whenever I use my tribahtinov mask for focusing I can immediately check to see whether my LX200 is actually collimated as well. If it is mis-collimated, I can immediately correct it by looking at the diffraction pattern produced by the mask.
For my mask to be useful to you, I have written a Python program to create any arbitrary tribahtinov mask and instructions for how to use it. You can get more information here.
The ultimate dew shield
Dew is, of course, the bane of astrophotography. When I was bitten by dew during a long night of astrophotography, I got really pissed. Right after this dew episode, I decided to get even. I looked around to buy a commercial dew shield to forever consign this problem to the annals of history. Unfortunately, nothing bit my fancy because I thought that I could do better than the commercial units. In my opinion, it is ridiculous that most dew shields are not silver because that's the best color to reduce radiative cooling. Therefore, in my design, the dew shield is metallic silver. Furthermore, in order to put the "ultimate" in my ultimate dew shield, I designed an electronic controller that measures the dew point and then sets the internal temperature of the shield to a few degrees (that the you can set) above the dew point.
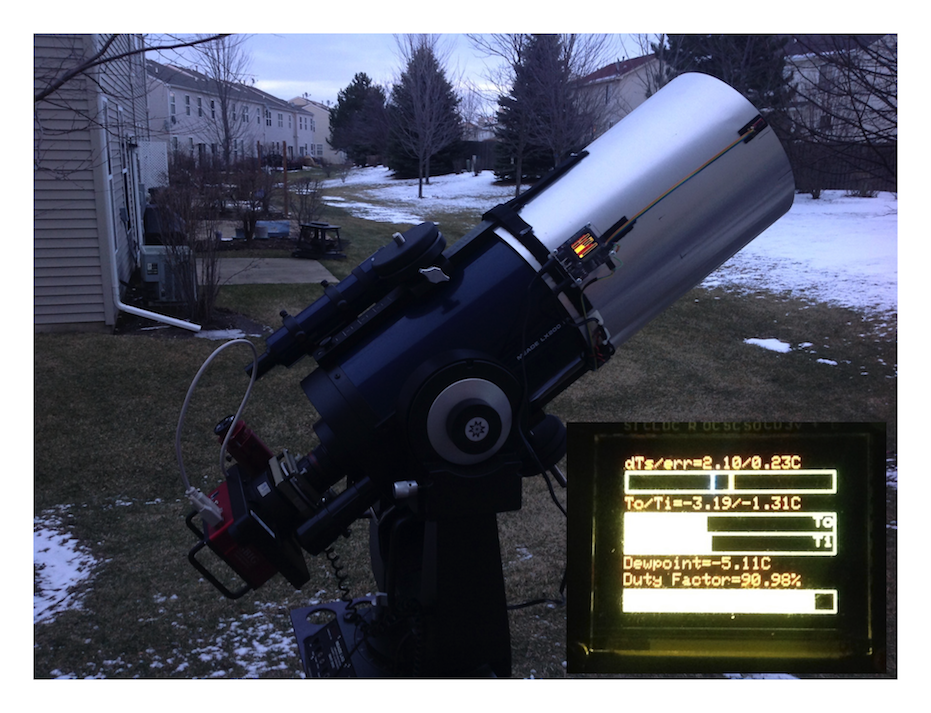
So, if you want a dew shield that actually makes sense and works great, the plans for building my ultimate dew shield can be found here.
A power distribution unit
It's not very sexy, but I decided to build a power distribution to escape from my wall-wart hell. I have too many pieces of equipment that need their own wall-wart and they take up nearly every outlet on my power strip. I decided to build a box that produced all the voltages that I needed plus extra outlets for future expansion. Here's a picture of my power distribution unit:

The plans for building my power distribution unit can be found here.
An ETX125 electric focuser
My other telescope is an ETX125. Unfortunately, Meade no longer makes an electric focuser, part number #1247, for it. I decided to cannibalize the parts from the electric focuser for the ETX90, ETX105, part number #1244, to make one.
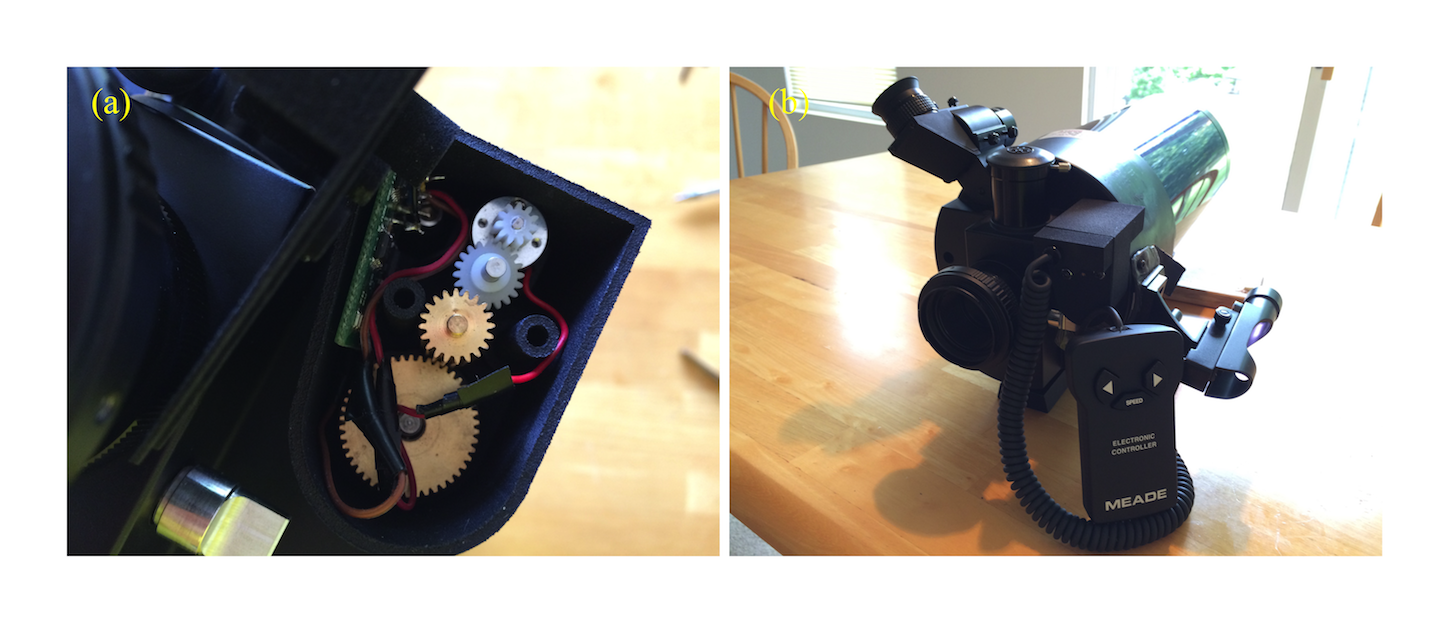
The plans and instructions for building the case that holds the cannibalized parts can be found here.
A bracket for mounting the SharpSky Pro focuser on the FSQ106 or FSQ106N
My newest telescope is the FSQ106. I bought an electric focuser from SharpSky Pro for it. But in order to use it, I have to mount it on the FSQ106. The plans and instructions for making the mounting bracket can be found here

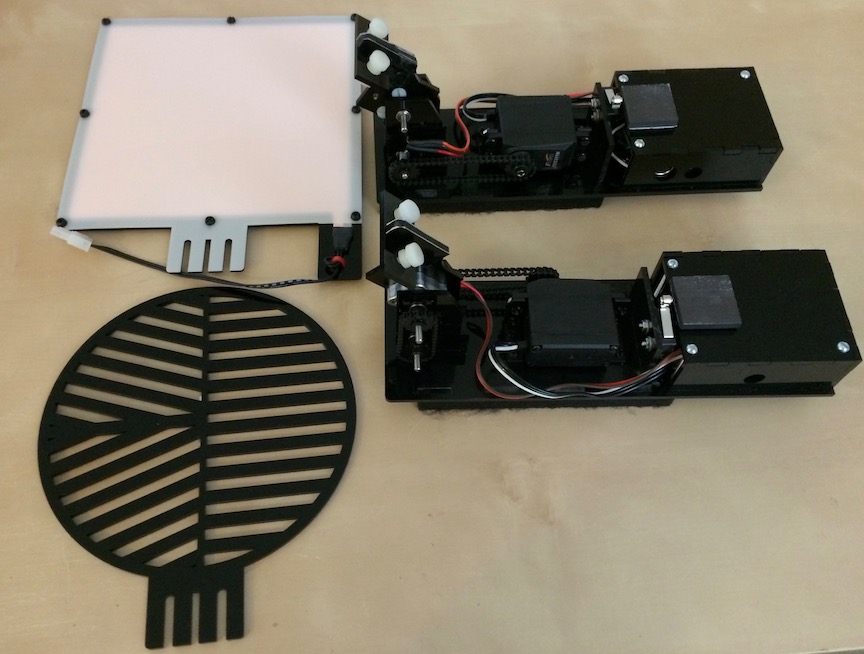
A remote controlled flip Bahtinov mask and lamp for focusing and flats
I got a little tired of getting my butt off my couch many times during an imaging session to place my Bahtinov mask on my FSQ106 to check focusing. This irritation finally motivated (forced) me to do something about it: I wanted a remote controlled flip mask so that I could just stay in the house for the entire imaging session.
After a quick check on the web, I found that the only commercial source for flip masks and lamps are made by Alnitak. Unfortunately, the price for a pair of flip mask and lamp are very expensive: they will set me back by about $1000! My thoughts then went onto designing my own. A quick sketch of my ideas showed that I can make a pair for about half the price! In fact, it turned out to cost about $700 that included fixing mistakes. If the work was error free, it would have cost around $400. You can see the cost break down in the bill of materials.
Note: The reason why I wanted a mask and lamp pair is because of balance. IMO, it is rather odd to have only one device mounted on one side the scope that causes an immediate imbalance.
Here are photos of my Bahtinov mask, lamp and both controllers:

A movie demonstration of how my flip mask and lamp works is shown
here:
The plans and instructions for making the flip mask and lamp can be found here
A Column Adapter for the Ioptron Tri-pier
This project is not very sexy but is useful nonetheless. I wanted to mount my USB hub securely to my Ioptron tripier but I couldn't find a column adapter for doing this. Since I couldn't find them, I decided to design a set of column adapters for 3D printing.
Here's how the column adapter and USB3 hub mounted on my tripier look
like:
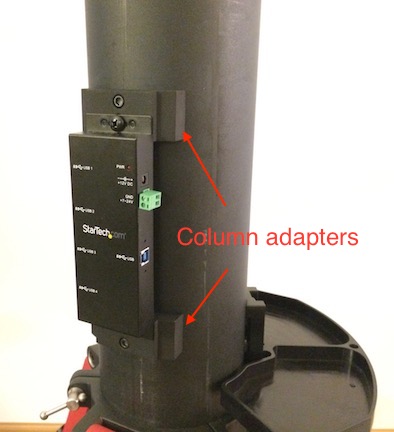
The stl file and Openscad source code can be found here
Copyright
All my projects are copyright C.Y. Tan and are distributed under the following licenses
- All software is released under GPLv3
- All documentation is released under Creative Commons Attribution-ShareAlike 3.0 Unported License or GNU Free Documentation License, Version 1.3
- All hardware is released under CERN Hardware Open License v1.2
Support or Contact
You can submit bug reports or feature requests via the issues tab at the top of each github project page.
Of course, I don't guarantee that anything that I publish actually works ☺. So build at your own risk!
Last update
Page was last updated on 11 April 2026 Revision 535a090463c95f2f7059ba538b558e03202d93fd